


Administering an Incus server remotely rests on two complementary methods: the CLI with a remote authenticated by token, and the web interface incus-ui-canonical. This guide exposes the server API, adds a remote on the client side, handles trust through a token, then installs the graphical UI. The commands apply to Incus 7.0; the UI shown here runs on a three-node cluster.
What you will learn
- Expose the API of an Incus server on the network.
- Add a remote and authenticate it with a token.
- Install the web interface
incus-ui-canonical. - Secure the access (certificate, reverse proxy).
Configuring the server for remote administration
Before connecting a client, the Incus server has to accept remote connections. On the server, enable the secure HTTP API by giving the address and port:
incus config set core.https_address <IP address>:8443Configuring a client to administer a remote server
To administer an Incus server remotely, the client needs a secure connection. The main steps:
-
Install the Incus CLI on the client machine. If it is missing, follow the installation guide, installing only the
incus-clientpackage. -
Generate a token on the server:
incus config trust addcreates a single-use trust token. The token carries the address of the server and its certificate fingerprint.Terminal window incus config trust add client-box# Client client-box certificate add token:# eyJjbGllbnRfbmFtZSI6... -
Add the remote on the client: paste the token. There is no address to type and no certificate to accept by hand, it is all in the token.
Terminal window incus remote add cluster eyJjbGllbnRfbmFtZSI6... -
Check the connection: prefix commands with the remote name followed by
:. On a cluster, theLOCATIONcolumn shows which node runs each instance.Terminal window incus list cluster: -c ns4tL+------+---------+----------------------+-----------+----------+| NAME | STATE | IPV4 | TYPE | LOCATION |+------+---------+----------------------+-----------+----------+| web1 | RUNNING | 10.107.24.164 (eth0) | CONTAINER | node2 || web2 | RUNNING | 10.107.24.252 (eth0) | CONTAINER | node3 || web3 | RUNNING | 10.107.24.100 (eth0) | CONTAINER | node1 |+------+---------+----------------------+-----------+----------+
The client is ready: every incus ... cluster: command now drives the remote server securely.
What the Incus web interface offers
The Incus user interface simplifies managing containers and virtual machine instances through a graphical approach. The main features:
- Container management: reach the list of your containers, with options to start, stop, create and delete instances in a few clicks. The console and a terminal are included.
- Network and volume management: adjust the network configuration of containers, manage interfaces, and add or remove storage volumes.
- Image management: download, import and delete local images.
- Logs and alerts: read the activity logs of each instance and configure alerts to spot incidents quickly.
- Server configuration: adjust the Incus server settings.
Together these give complete, simplified management of Incus instances, making administration more accessible while staying powerful.
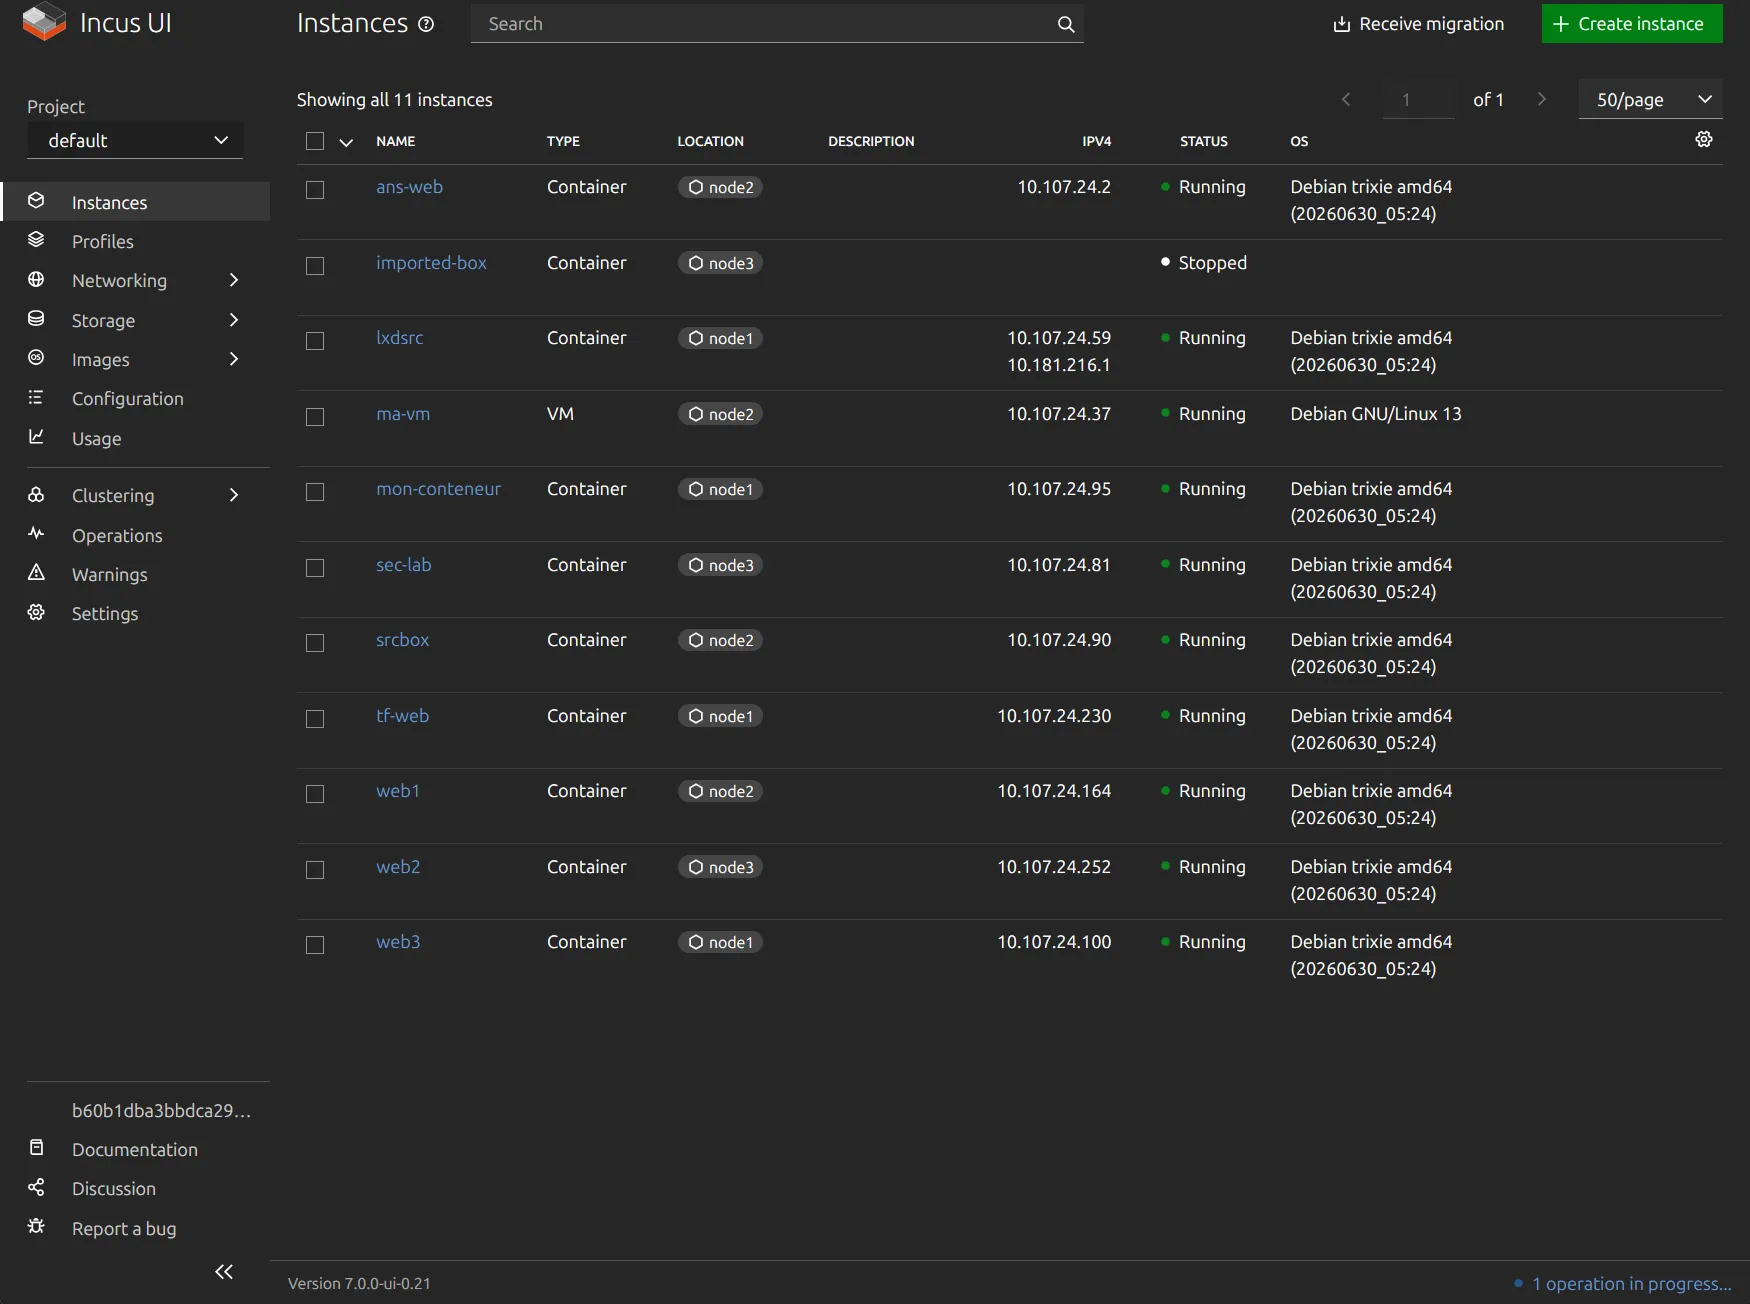
Installing the graphical interface on the server
A project forked the LXD interface to support Incus, which gives a fully web-based administration interface. The package is called incus-ui-canonical, and it currently ships in the Zabbly repository covered in the installation guide.
sudo apt install -y incus-ui-canonicalAs for the command line, the API has to be enabled on the Incus server: follow the procedure above.
Configuring the certificate
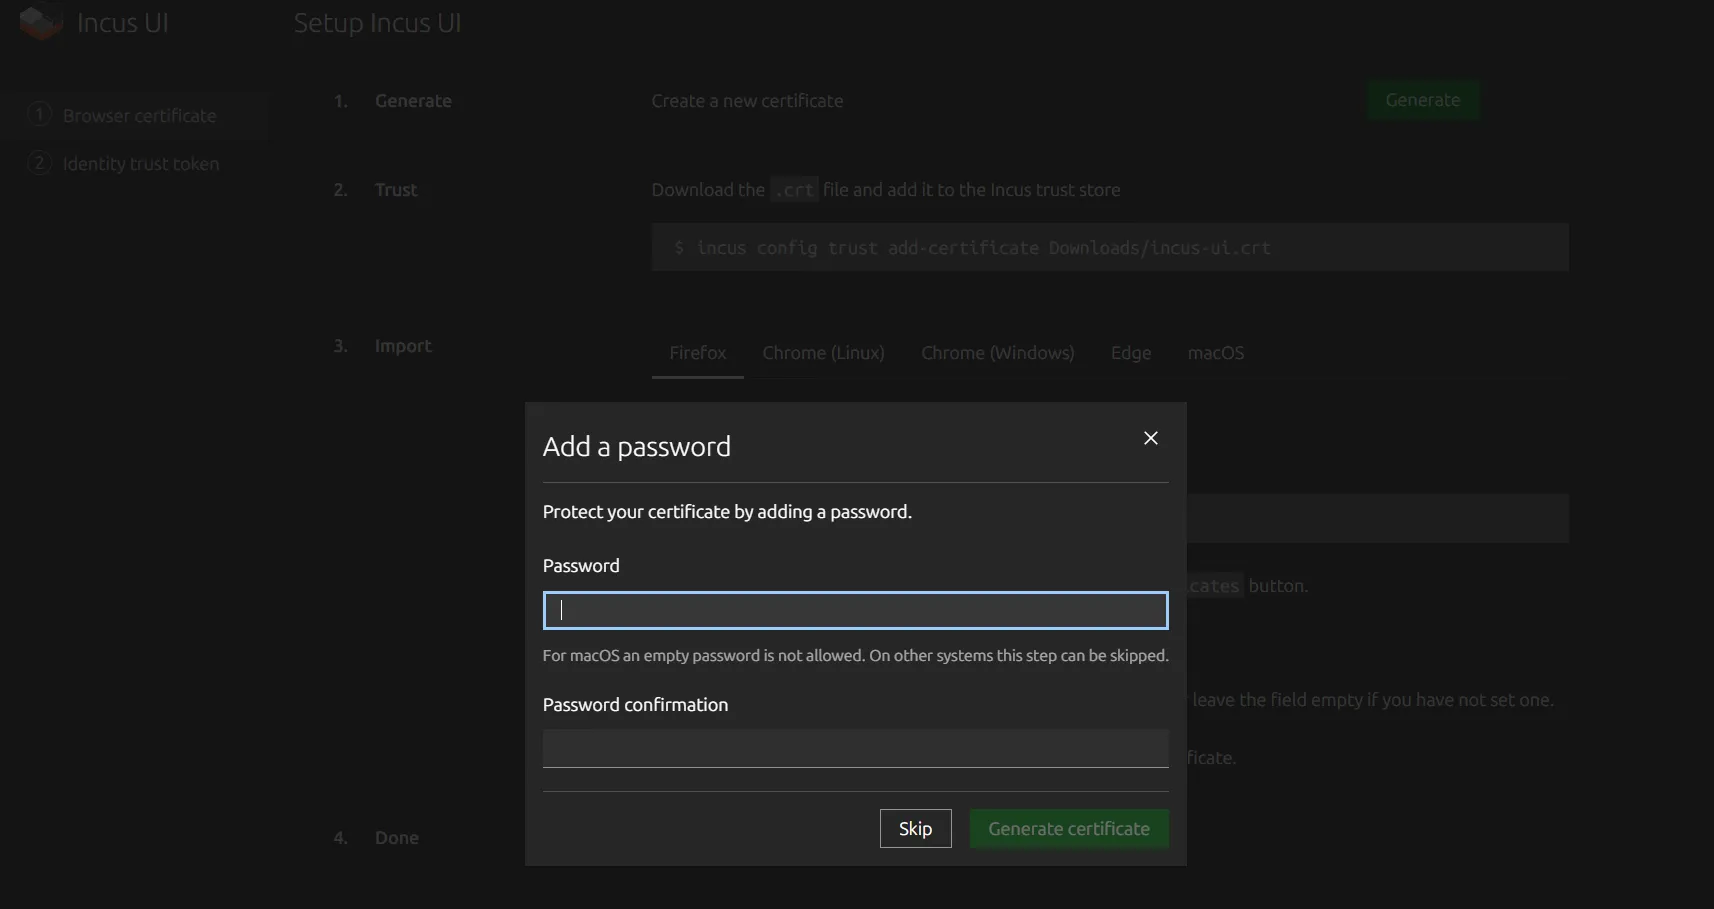
The setup is fully guided. Follow the steps shown in the screenshot below:
-
Generate the certificate and copy it onto the server running the Incus instance.
-
Run the command, changing the certificate file path.
Terminal window incus config trust add-certificate incus-ui.crt -
Download the
.pfxcertificate and install it on your machine as instructed. -
Restart the browser and select the right certificate.
The Incus graphical interface is then reachable.
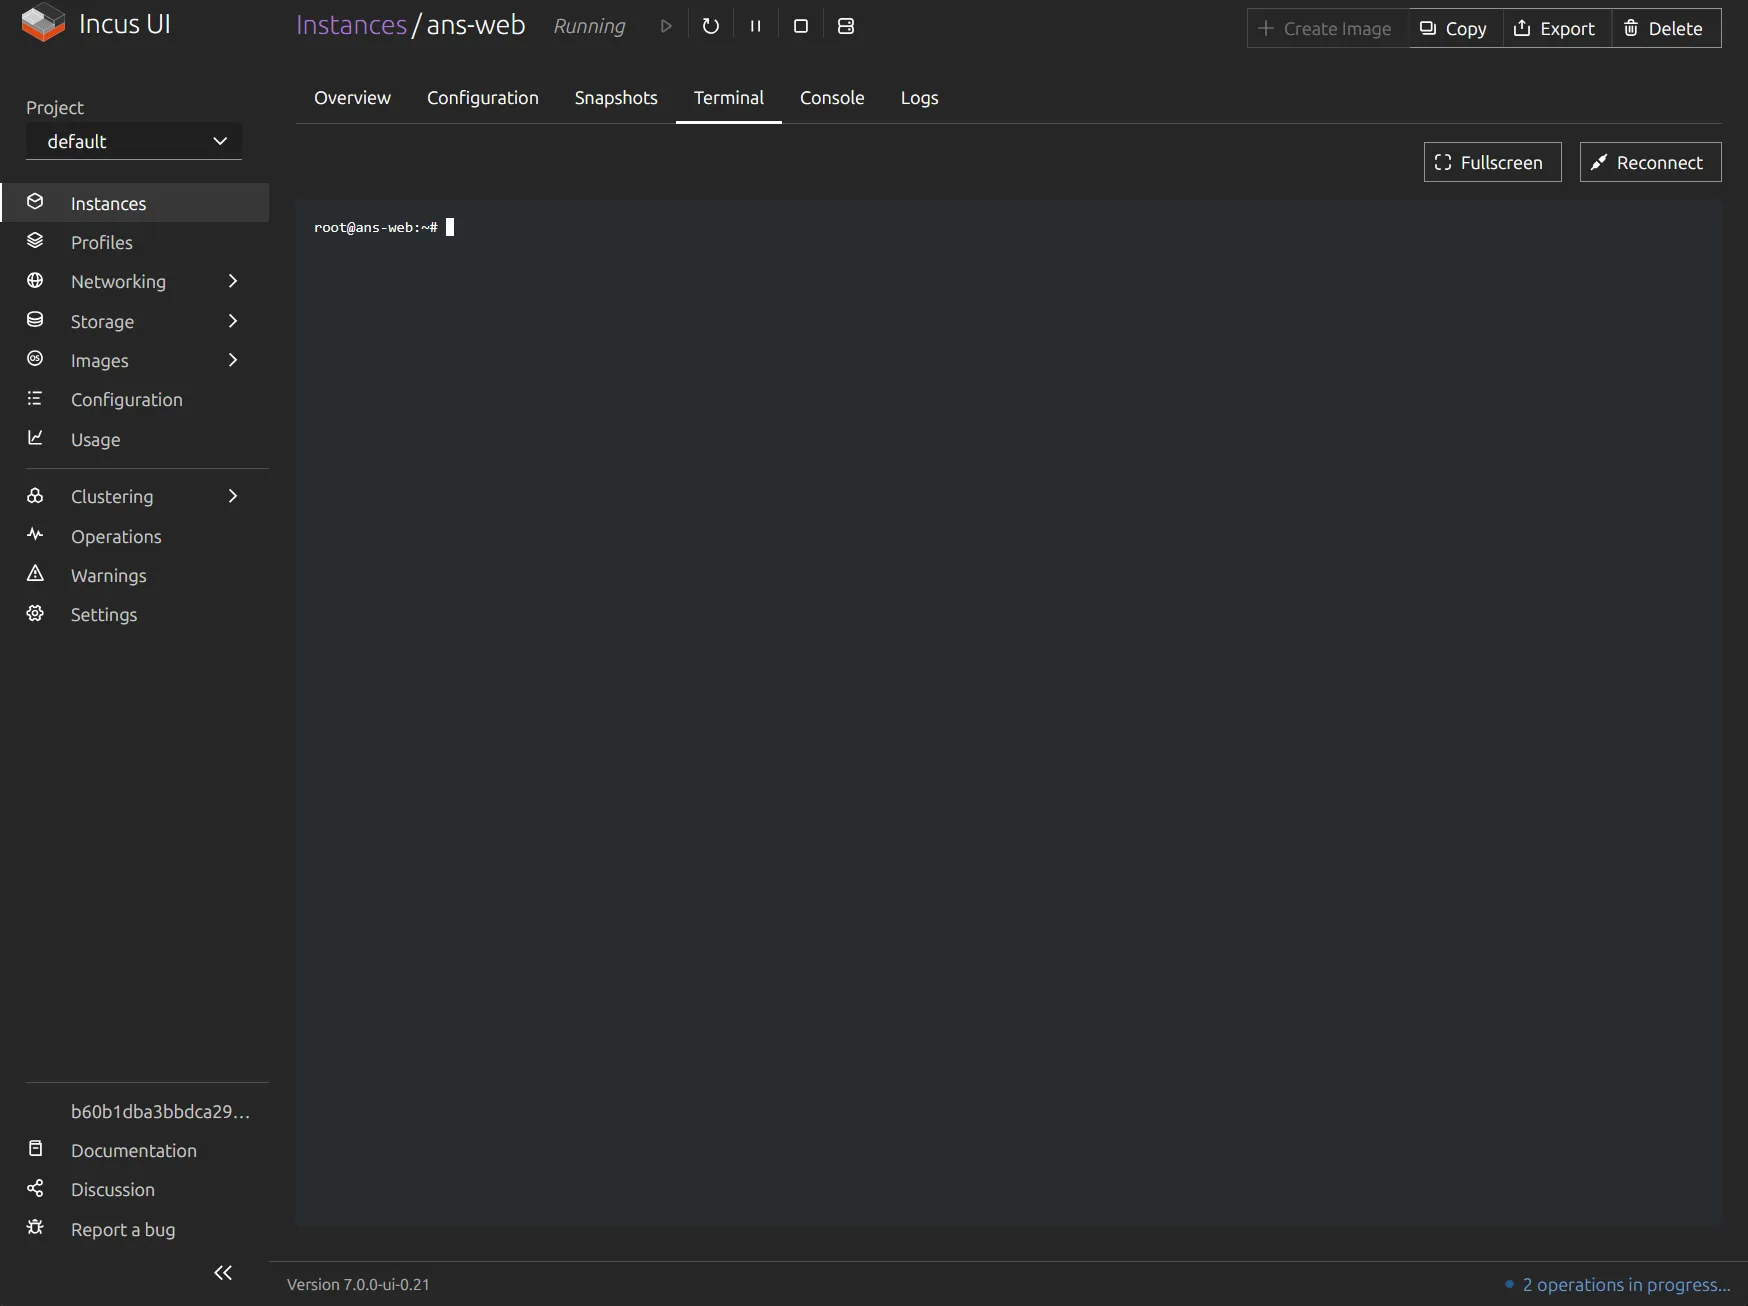
To avoid exposing the API directly, you can put the UI behind a reverse proxy (Traefik, Nginx) handling TLS and access. That is good practice as soon as the server is reachable beyond a trusted network.
Key points
- Remote access requires the API to be exposed:
incus config set core.https_address=:8443. - The remote authenticates with a token:
incus config trust addon the server,incus remote add <name> <token>on the client. - The token carries the address and the fingerprint: no manual certificate acceptance.
- The web UI
incus-ui-canonical(Zabbly repository) gives graphical management, clusters included. - Exposed beyond a trusted network, put the UI behind a TLS reverse proxy.
FAQ: common questions about Incus remote access
One trust token, two commands
On the server, incus config trust add creates a single-use token carrying the server address and its certificate fingerprint:
incus config trust add client-box
On the client, paste the token to add the remote:
incus remote add cluster eyJjbGllbnRfbmFtZSI6...
No address to type, no certificate to accept manually: it is all in the token.
core.https_address
By default, Incus does not listen on the network. You enable the HTTPS API by binding an address and port 8443:
incus config set core.https_address <IP address>:8443
That step is mandatory before adding a remote on the client side or installing the web interface incus-ui-canonical. Exposed beyond a trusted network, put the access behind a TLS reverse proxy.
The Incus web interface
incus-ui-canonical is the Incus web administration interface, a fork of the LXD UI adapted to Incus. It ships in the Zabbly repository:
sudo apt install -y incus-ui-canonical
It offers fully web-based management of containers, virtual machines, networks, volumes and images, console and terminal included, on a cluster too. The API has to be exposed first, and the certificate setup is guided.
A reverse proxy in front of the UI
To avoid exposing the API directly, put the UI behind a reverse proxy (Traefik, Nginx) handling TLS and access control:
- the Incus API stays on the internal network;
- the reverse proxy carries the certificate and filters connections.
That is good practice as soon as the server becomes reachable beyond a trusted network. Client certificate access added through incus config trust add-certificate complements that protection.
Next steps
- Securing Incus: what to lock down once the API no longer listens only on the local socket.
- Incus OS without a shell: a system where remote API administration is not an option but the only mode.
- GPU in Incus: attach an NVIDIA card to an instance hosted on the server you drive remotely.