

The appliance is a Debian 13 virtual machine where dsoxlab, Ansible,
Terraform and a desktop are already in place: you import it, you start it, you
play. It exists for Windows and macOS, where uv tool install dsoxlab is not a comfortable option, and for anyone who prefers a
throwaway machine to their own. On Linux it is the wrong answer, and this
lesson says so plainly: downloading half a gigabyte to save one command makes
no sense. No knowledge of virtualisation is assumed.
What you will learn
- Check that your computer has the memory and disk the appliance asks for.
- Choose the right file of the release,
.ovaor.qcow2, and verify its digest before importing. - Import the image into VirtualBox, and what changes for VMware.
- Enable nested virtualisation, without which
vmlabs do not start. - Understand what the first boot installs, and why it reboots on its own.
What you need
The appliance is only light at download time. Once started, it requires free memory on top of what your system already uses, and the first boot downloads about 1.5 GB: dsoxlab, the hypervisors and the desktop. That is deliberate, nothing is pinned in the image, so nothing in it is stale.
| Minimum | Comfortable | |
|---|---|---|
| Memory | 4 GB free for the VM | 8 GB, required for vm labs |
| Disk | 25 GB free | 40 GB |
| CPU | 2 cores | 4 cores |
| Software | VirtualBox (free), or VMware Workstation and Fusion, see below | |
| Network | a connection, for the first boot |
The figures in the "comfortable" column are not an estimate: the image's recipe announces 4 CPUs and 8 GB because the three machines of the Linux catalogue share 5120 MB, and a guest with 2 vCPU has already been seen reporting a host ready at 181 seconds, one second after the waiting window closed. The lesson Sizing your machine for the labs details those figures catalogue by catalogue.
Where the image is published, and which file to take
The images are attached to the project's releases on GitHub, on the page
github.com/stephrobert/dsoxlab/releases,
and the project's rule is that they are rebuilt there on every published
version, patch releases included. Release v0.2.5, published on
2026-09-26, is the first to carry them, and the format decides the
hypervisor: the .ova imports into VirtualBox and VMware, the .qcow2 serves
KVM/libvirt and Proxmox. The sizes below are the ones the release declares,
read the same day.
| File | For | Size |
|---|---|---|
dsoxlab-appliance-0.2.5.ova | VirtualBox on Windows, Linux and Intel Mac; VMware Workstation and Fusion | 416 MiB |
dsoxlab-appliance-0.2.5.qcow2 | QEMU/KVM, libvirt, Proxmox | 433 MiB |
SHA256SUMS | Verifying what you downloaded, before importing | 194 bytes |
provenance.intoto.jsonl | The SLSA v1 provenance attestation of the release, produced by release.yml: read the same day, it covers the Python wheel and source archive, not the images | 11 KiB |
If you are starting out, take the .ova. Only the last two sets of
images are kept: older releases keep their page and their Python
distributions, without their images, because an image that pins nothing offers
no reproducibility, only its weight. The file name always follows the
release number without its v: the next release will carry a
dsoxlab-appliance-<version>.ova of the same pattern.
Two design choices explain that reduced weight. The image pins no version of dsoxlab: the first boot installs the latest published one, which avoids republishing half a gigabyte at every patch. And it does not embed the hypervisors: they are only installed at first boot if the host exposes nested virtualisation, checked live and never assumed.
Step 1: install VirtualBox
VirtualBox is the appliance's reference hypervisor, the one on which the import, the boot and the desktop have been proven. It downloads from virtualbox.org, and the package to take depends on the system:
- Windows: Windows hosts. Double-click, follow the wizard, and accept the network driver installation when Windows asks.
- macOS Intel: macOS / Intel hosts. After installing, macOS may block the extension: open System Settings, Privacy & Security, then Allow for Oracle.
- Linux: your package manager, or the package on that page.
The Extension Pack offered on the same page is not needed: nothing in the appliance uses it.
Step 2: download the image and verify its digest before importing
Download the release's .ova and, next to it, the SHA256SUMS file. A
416 MiB file coming from the internet is verified before being imported,
never after: that is the supply chain rule this site teaches everywhere,
and an image started without a check would contradict the whole point.
Compute the digest of the file you received:
# Windows, in PowerShellGet-FileHash .\dsoxlab-appliance-0.2.5.ova -Algorithm SHA256# macOS and Linuxshasum -a 256 dsoxlab-appliance-0.2.5.ovaThe value printed must be the one SHA256SUMS gives for that file. Here is
the content of the file published with v0.2.5, read on the day of the
release: the digest of the .ova starts with aad053dc, that of the
.qcow2 with 5b401088.
aad053dc69a7a2960a630828006cc8d5fb51563f8a24565b7a93064c14cdf4cc ./dsoxlab-appliance-0.2.5.ova5b40108895850fd40d97a9ec8be9046bcfbc87a3db8df32c83d78b707da5e7f0 ./dsoxlab-appliance-0.2.5.qcow2If the value differs, the download is incomplete or tampered with: start it
again rather than importing an image that will fail further on, on an OVF
error that will not name its cause. Both images are x86-64, which matters
on recent Macs: an Apple Silicon Mac does not run them, and
uv tool install dsoxlab is the answer there, with every shell lab
available.
Step 3: import the image
In VirtualBox, File, Import Appliance, pick the .ova file, then
Next. Double-clicking the .ova opens the same window. The next screen
lists what the machine advertises, 4 CPUs and 8192 MB of memory, and
both values can be changed right there. The moment is well chosen:
- your computer has 8 GB of RAM in total: bring the VM down to 4096 MB.
shelllabs will work,vmlabs will not, anddsoxlab doctorwill say so rather than leave you guessing; - your computer has 16 GB or more: leave 8192 MB.
Click Finish. The import takes one to three minutes, while VirtualBox decompresses the disk.
What changes for VMware Workstation and Fusion
The same .ova image serves VMware Workstation and Fusion, with a
nuance worth knowing: that import has not been proven directly on VMware.
What is guaranteed at every build is that the OVF descriptor is validated
against the DMTF schema and declares what VMware expects. VirtualBox imports
almost anything, VMware checks: conformance to the specification is the only
honest way to hold that claim without a licence.
For vm labs, VMware has its own nested virtualisation setting,
Virtualize Intel VT-x/EPT, in the machine's processor settings,
machine powered off. The rest of the steps, boot, login and first lab, is
identical.
Step 4: enable nested virtualisation for vm labs
Skip this step if you only want shell labs. A vm lab starts real machines
inside the appliance; your computer therefore has to allow a virtual
machine to launch others. That setting is made outside the appliance, with
it powered off, because nesting is a property of the host, not of the
guest: nothing installed in the appliance can produce it.
In VirtualBox, select the machine, then Settings, System, Processor, and tick Enable Nested VT-x/AMD-V. On the command line, the machine name is the one VirtualBox shows after the import:
VBoxManage modifyvm "dsoxlab-appliance-<version>" --nested-hw-virt onIf the box is greyed out, your CPU or your BIOS does not expose it, and
shell labs remain entirely playable. One frequent case on Windows deserves a
name: nesting is unavailable in VirtualBox when Hyper-V or WSL2
already holds the machine's hypervisor.
Step 5: start it, and let it work
Select the machine and click Start. What you are about to see plays in three acts, with nothing to type:
- a few seconds of white text on a black background, Debian booting;
- several minutes where the machine seems to wait at a login prompt. It is not idle: it is installing dsoxlab, the hypervisors and the desktop. Count five to fifteen minutes depending on your connection;
- the machine reboots on its own, and shows the login screen.
That reboot is not an incident: group membership and the desktop only take effect at the next boot. If something fails, the machine says so and starts over at the next boot: it never marks itself configured wrongly. The usual cause is a missing network in the virtual machine; check its network adapter under Settings, Network, then restart it.
Step 6: log in
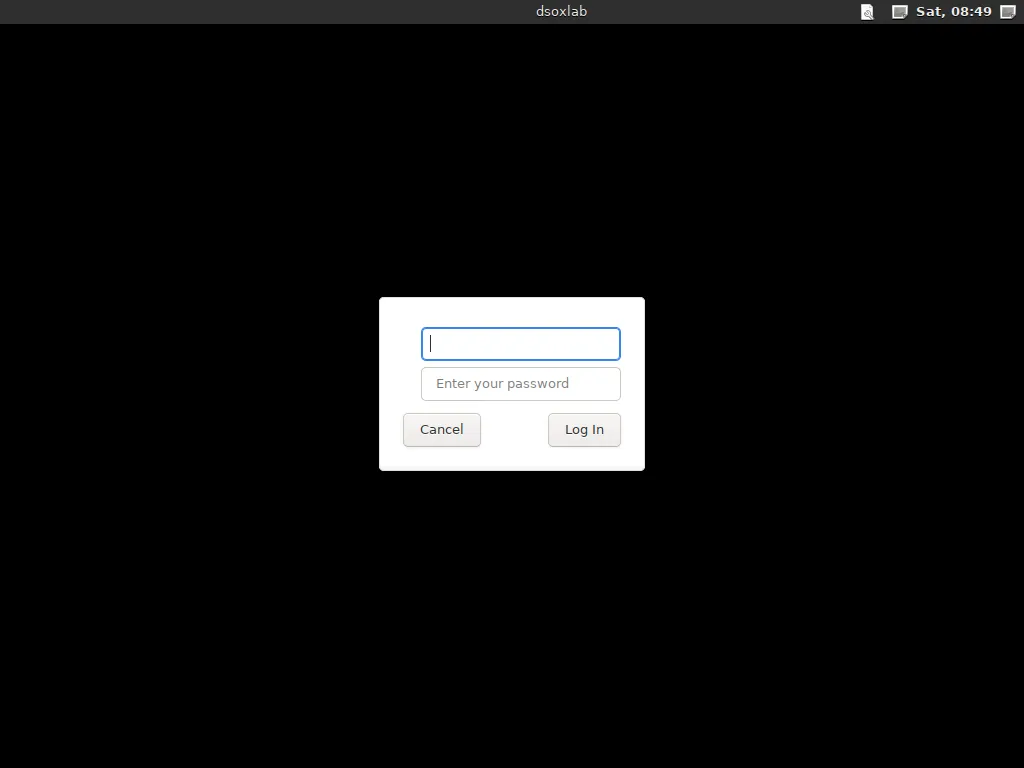
The user is student and the password dsoxlab. The machine requires
you to change that password right away, and that is deliberate: a password
shipped with a public image is secret to nobody. It asks for the old one,
then the new one twice. You land on an XFCE desktop; the terminal is in the
bottom bar, second icon.
Step 7: play a first lab
In the terminal, the demonstration lab confirms that everything works before you invest in a full catalogue. It needs neither a VM nor a container:
dsoxlab demo                 # installs a one-lab demonstration cataloguecd ~/.local/share/dsoxlab/demo
dsoxlab course premiers-pas     # the lessondsoxlab run premiers-pas        # drops you into the working directorydsoxlab challenge premiers-pas  # the missiondsoxlab check premiers-pas      # the tests, and the score
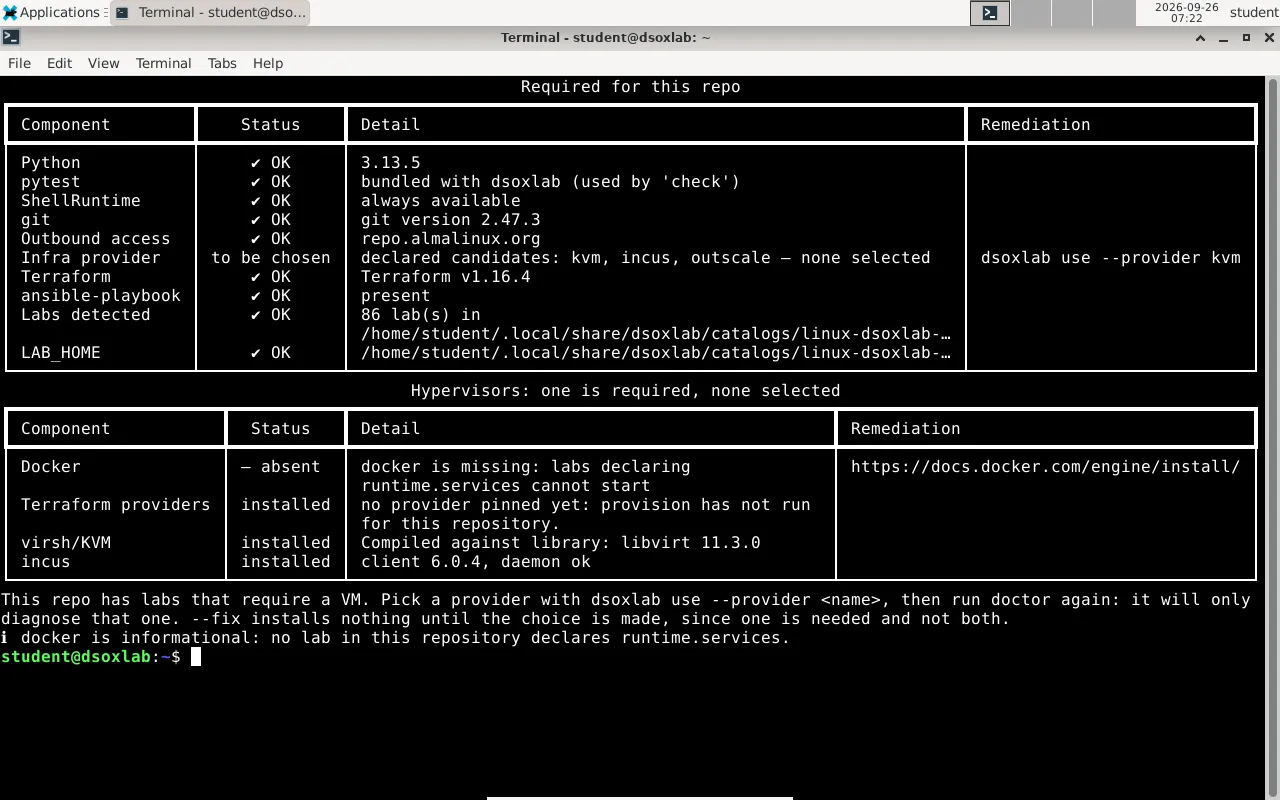
Then install a real catalogue. doctor says what this machine can do
and what is missing, and names the only choice left when the catalogue offers
several hypervisors:
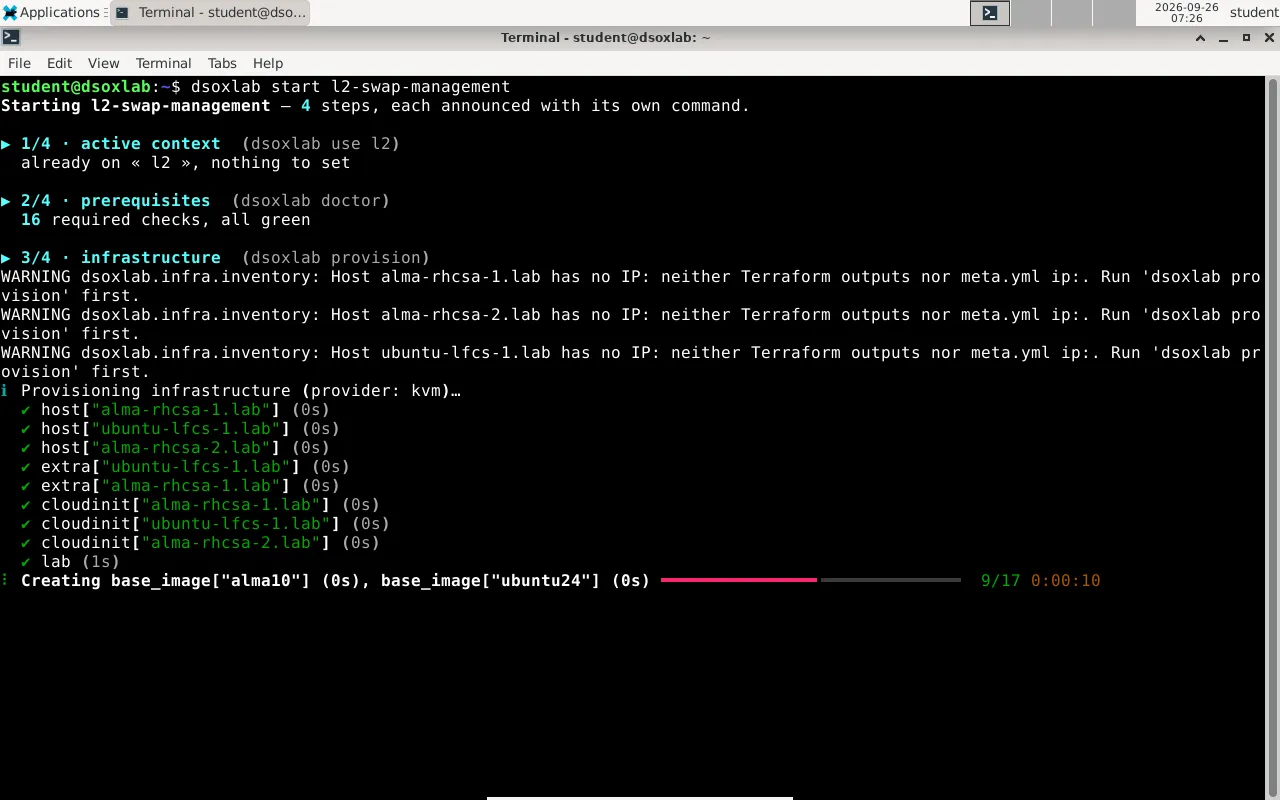
dsoxlab catalog add https://github.com/stephrobert/linux-dsoxlab-trainingdsoxlab doctor # what this machine can do, and what is missingdsoxlab list-labs # the catalogue's 86 labsdsoxlab use --provider kvm # the choice doctor namesdsoxlab start <lab-id> # context, prerequisites, infrastructure, sessionOn a vm lab, start shows its required checks green, then
Terraform brings up the lab's machines: VMs inside the VM, which is
exactly what step 4 made possible.
What is inside
The image is a minimal Debian 13, plus what a lab workstation needs:
git, curl, vim, python3, man, Ansible and Terraform. After the
first boot, dsoxlab, the hypervisors and the desktop are added.
Documentation and locales other than English and French are excluded from
the packages, which is most of the half gigabyte you do not download.
Known limits
Three limits are worth knowing before building on it. One user, one
machine: the appliance is not a shared classroom server, and a trainer
serving several learners should read the lesson
Bringing up the infrastructure of vm labs
instead. The disk is 20 GB: enough for a catalogue and a few lab VMs, not
for a Kubernetes cluster; it can be enlarged in your hypervisor when needed.
No automatic update: uv tool upgrade dsoxlab updates the tool inside an
appliance already installed, and importing a newer image only brings an updated
system, since dsoxlab is installed fresh at the first boot of every machine.
Troubleshooting
Each line names the most frequent cause and the gesture that fixes it.
When none matches, dsoxlab support --issue fills in an anonymised
diagnostic report and opens the issue in the right place: a report beats a
workaround.
| Symptom | Most frequent cause | Gesture |
|---|---|---|
| The machine stays on a console, no desktop | The first boot did not complete | It starts over at the next boot: restart the VM after checking its network |
| "Temporary failure in name resolution" | The VM has no network | Settings, Network, adapter 1 enabled, attached to NAT |
dsoxlab doctor says nested virtualisation is missing | It is enabled on your computer, not inside the VM | Step 4, appliance powered off |
doctor says "RAM: … available for … declared" | The VM is too small for this catalogue | Give it more memory, or play shell labs |
| The import fails on an OVF error | Incomplete download | Check the SHA256 digest again |
Key points
- The appliance serves Windows and macOS Intel; on Linux,
uv tool install dsoxlabremains the right answer. - The image is published with the release, from
v0.2.5on: the.ovafor VirtualBox and VMware, the.qcow2for KVM and Proxmox,SHA256SUMSnext to them. - The digest is verified before the import, never after: a 416 MiB image started without a check contradicts everything the site teaches.
- It pins nothing: the first boot installs the latest dsoxlab and, if the host allows it, the hypervisors.
- 4 CPUs and 8 GB are measured, not estimated; with 8 GB in total on the
host, go down to 4096 MB and stick to
shelllabs. - Nested virtualisation is enabled on the host, appliance powered off, and stays unavailable in VirtualBox on Windows when Hyper-V or WSL2 is active.
- The first boot takes five to fifteen minutes and reboots on its own; a failure replays at the next boot.
Next steps
- The main dsoxlab commands: what
startchains inside the appliance, and every command taken alone. - Files, environment variables and exit codes: where the appliance keeps progress and the log, to save them before throwing it away.
- Bringing up the infrastructure of vm labs: nested virtualisation seen from the trainer's side, with the KVM, VMware and VirtualBox settings side by side.